 Birch Bay Exterior
 Building a Deck for Sandy Point's Waterfront Conditions
Sandy Point sits right up against the water, and that location is exactly why decks here fail faster than decks built ten miles inland. Salt-laden air corrodes fasteners and hardware, wind-driven rain finds every gap in flashing and decking seams, and the long stretch of overcast, damp months each year keeps wood surfaces wet enough, long enough, for moss and algae to take hold. A deck built to a generic spec — the kind that works fine in a dry inland subdivision — does not hold up the same way out here.
This page is about what a deck actually needs to survive and look good in Sandy Point specifically: the material choices that make sense, the structural details that matter more here than elsewhere, and what our process looks like from first visit to final walkthrough.
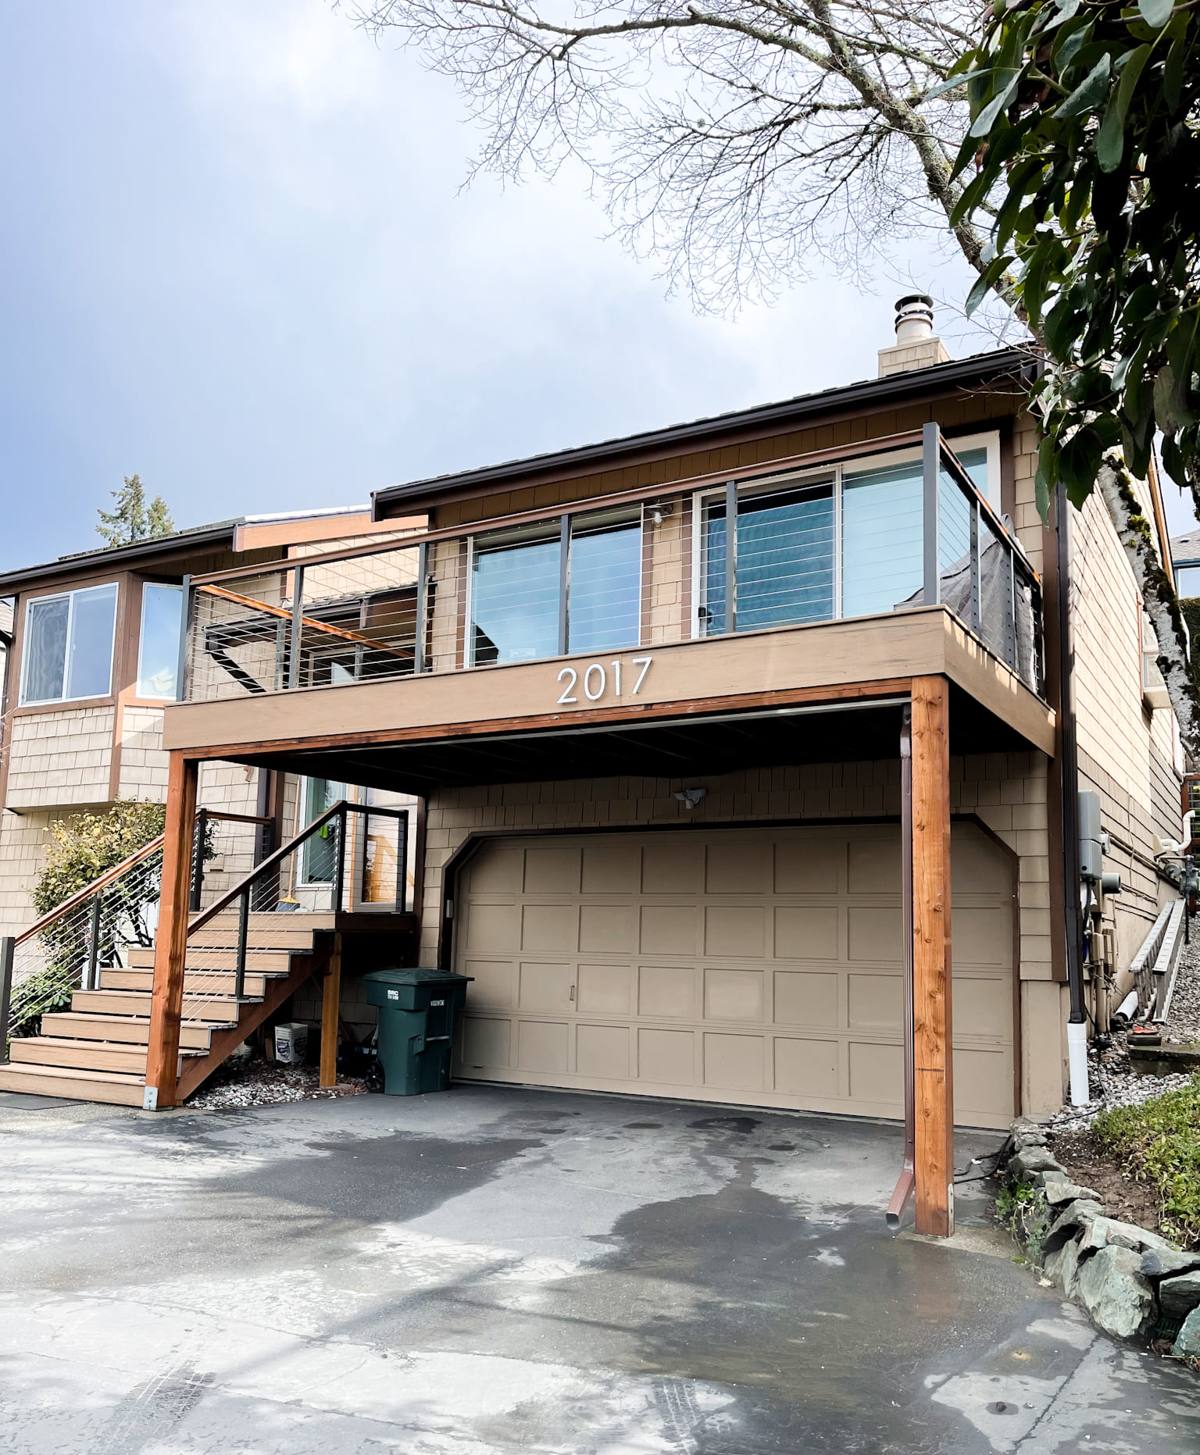
What Salt Air, Rain, and Moss Actually Do to a Deck
It helps to understand the failure modes before talking about fixes, because every recommendation below traces back to one of these three things.
Salt Air and Metal Fatigue
Airborne salt accelerates corrosion on anything metal — screws, joist hangers, bolts, railing brackets. Standard electro-galvanized fasteners can start showing rust streaks within a season or two this close to the water. Once a fastener starts corroding, it loses holding strength long before it looks obviously bad, which is a real safety issue in structural connections.
Wind-Driven Rain
Rain in Sandy Point rarely falls straight down. Wind off the water pushes it sideways and up under drip edges, ledger boards, and railing posts. Any deck detail that assumes rain only hits horizontal surfaces — a lot of standard construction assumes exactly that — will eventually let water into places it shouldn't be.
Moss and Surface Growth
Whatcom County's long damp season means shaded or low-airflow deck areas stay wet for extended stretches. That's the environment moss and algae need. Beyond looking bad, a moss-covered surface is slippery and holds moisture against the decking material, which shortens its life whether it's wood or composite.
Choosing Decking Material for This Climate
There isn't one "correct" decking material for Sandy Point — there are trade-offs, and the right call depends on budget, sun exposure, and how much upkeep you actually want to do.
| Material | Moisture/Moss Behavior | Maintenance | Typical Lifespan Here |
|---|---|---|---|
| Pressure-treated wood | Absorbs moisture, needs sealing to shed water; prone to moss in shaded spots without upkeep | Annual cleaning and re-sealing recommended | 10-15 years with upkeep, less without |
| Cedar | Naturally rot-resistant but still absorbs water; needs periodic treatment to keep that resistance | Cleaning and oiling every 1-2 years | 15-20 years with consistent care |
| Composite (capped) | Sheds water well, resists moss better than wood but still needs occasional washing in shaded areas | Periodic washing, no sealing/staining | 25+ years, backed by manufacturer warranty |
| Uncapped composite (older style) | Can absorb moisture at the core over time; more prone to surface growth | Regular cleaning to prevent staining | Shorter than capped composite |
For a home directly exposed to salt spray and shade from surrounding trees, we usually steer clients toward capped composite or a well-detailed cedar deck over untreated pressure-treated lumber for the walking surface — not because pressure-treated wood is a bad product, but because it demands more consistent maintenance than a lot of homeowners realize going in, and a missed year or two of sealing shows up fast in this climate.
Why We're Careful About Certain Composite Products
Not all composite decking is built the same. Older, uncapped composite boards can wick moisture into the core through cut ends and fastener holes, which is a real problem when every board on the project gets cut and every board gets face-screwed or hidden-fastened. Our standard is to use fully capped composite boards and to seal cut ends during installation — that's a fabrication and installation discipline, not a knock on the material category as a whole.
The Structural Details That Matter Most Here
The decking surface is what you see, but the framing underneath and the connections holding it together are what determine whether the deck is still safe in fifteen years.
Ledger Flashing
Where the deck attaches to the house is the single most common point of hidden water damage on any deck, anywhere. In a wind-driven rain environment, that connection needs proper flashing that directs water out and away from the house framing, not just a bead of caulk. We flash every ledger connection with that in mind, and we check the condition of existing flashing on any deck we're asked to repair or rebuild.
Corrosion-Resistant Fasteners and Hardware
Given the salt exposure here, we spec stainless steel or heavy hot-dip galvanized fasteners and structural hardware rather than standard electro-galvanized coatings. It costs more up front. It also means the joist hangers and structural bolts aren't the reason the deck needs rebuilding in ten years.
Joist Spacing and Airflow Underneath
Tighter joist spacing and proper ventilation underneath the deck reduce trapped moisture, which in turn reduces the conditions moss and rot need. We also grade and detail under-deck areas so water has somewhere to go instead of pooling against posts and footings.
Post Bases and Footings
Posts sitting in standing water or buried in soil rot from the base up, often invisibly until the deck starts to feel soft or unstable. We use elevated post bases that keep wood off wet soil and concrete, and we size footings for the soil conditions on the specific lot rather than using a one-size assumption.
Railings and Hardware Above the Deck Surface
Railings take direct wind and salt exposure with nowhere to drain to and no roof overhead protecting them, which makes them one of the faster-failing components on a waterfront deck if the wrong materials are used. We favor railing systems and baluster hardware rated for coastal or marine exposure, and we avoid mixing metals that accelerate galvanic corrosion against each other. A railing that loosens at the post connection is a safety issue, not a cosmetic one, so this isn't an area to cut corners on.
Our Deck Building Process
Every deck project we take on in Sandy Point follows the same general sequence, adjusted for the specific site, sun exposure, and how the deck will be used.
- Site visit and assessment — we look at sun/shade exposure, wind direction, existing structure (for rebuilds), and drainage on the lot.
- Design and material selection — sizing, layout, and material choice based on your budget and how much maintenance you actually want to take on.
- Permit handling — we pull the required permits and coordinate any inspections Whatcom County requires for the project.
- Demolition, if applicable — removing an existing deck, checking the ledger and house framing behind it for hidden water damage.
- Framing and flashing — ledger flashing, corrosion-resistant hardware, proper post bases and footings.
- Decking and railing installation — including sealed cut ends and consistent fastener spacing.
- Final walkthrough — we go over care and maintenance specific to the material you chose before we consider the job done.
Permits and Setbacks in Whatcom County
Deck construction in Whatcom County, including in the Birch Bay area, generally requires a building permit once the deck exceeds a certain height or size, and waterfront-proximate lots can carry additional setback or shoreline considerations depending on the specific parcel. Requirements vary by lot and by how close the property sits to the water, so we don't guess on this — we confirm what applies to your specific address and handle the permit application as part of the job rather than leaving it on the homeowner's plate.
Maintenance Checklist for a Sandy Point Deck
Whatever material you choose, a bit of regular upkeep is what separates a deck that lasts from one that doesn't, especially this close to the water.
- Sweep debris off the deck regularly so it doesn't trap moisture against the surface
- Rinse salt residue off railings and decking after storms with onshore wind
- Clean shaded or low-airflow areas more often — that's where moss establishes first
- Check ledger flashing and the house connection point once a year for signs of water staining
- Inspect fasteners and hardware periodically for early rust, especially on older electro-galvanized hardware
- Reseal or refinish wood decking on the schedule the product actually needs, not just when it looks dull
- Keep gutters and downspouts near the deck clear so runoff isn't dumping directly onto or under it
Repair, Rebuild, or Replace?
Not every aging deck in Sandy Point needs to be torn out completely. If the framing and ledger connection are sound and the damage is limited to surface boards or railings, a partial rebuild can make sense. But if there's soft or spongy decking, visible rot at the ledger, rusted-through hardware, or posts that feel unstable, that's usually a sign the structure itself has been compromised by moisture over time, and patching the surface without addressing what's underneath just delays a bigger repair later. We'll tell you honestly which situation you're in during the site visit — we're not going to sell a full rebuild when a repair will genuinely hold up, or the reverse.
Why Hire a Crew That Already Works in Sandy Point
A contractor who mostly builds decks in drier, inland parts of Washington isn't necessarily thinking about salt-rated hardware or ledger flashing details built for wind-driven rain, because their usual jobs don't demand it. Building along the Birch Bay shoreline day in and day out means these aren't edge-case considerations for us — they're the baseline for every project. That's the difference between a deck that needs attention again in a few years and one that's built for the conditions it actually has to survive.
If you're planning a new deck or need an honest look at one that's showing its age, we're happy to come take a look. Fill out the form below for a free, no-pressure estimate — we'll tell you what your specific site needs and what your options actually cost.