 Birch Bay Exterior
 Siding Repair in Lynden: What Local Homes Are Up Against
Lynden homeowners deal with a mix of conditions that most siding was never engineered for. You're close enough to the water to catch salt-laden air on windy days, far enough inland to sit under low cloud cover for weeks at a stretch, and squarely inside the stretch of Whatcom County where moss and mildew have a longer growing season than the lawn does. Add in decades of driving rain that finds every seam, nail hole, and caulk joint, and it's no surprise that siding here fails faster than the manufacturer's brochure suggests.
We're based in Birch Bay and have worked on homes throughout this part of Whatcom County long enough to see the same failure patterns repeat: soft spots at the bottom courses, swollen J-channel around windows, and paint that's cracking years before it should. Repairing siding correctly here means understanding why it failed in the first place — not just patching the visible damage and hoping it holds through another winter.
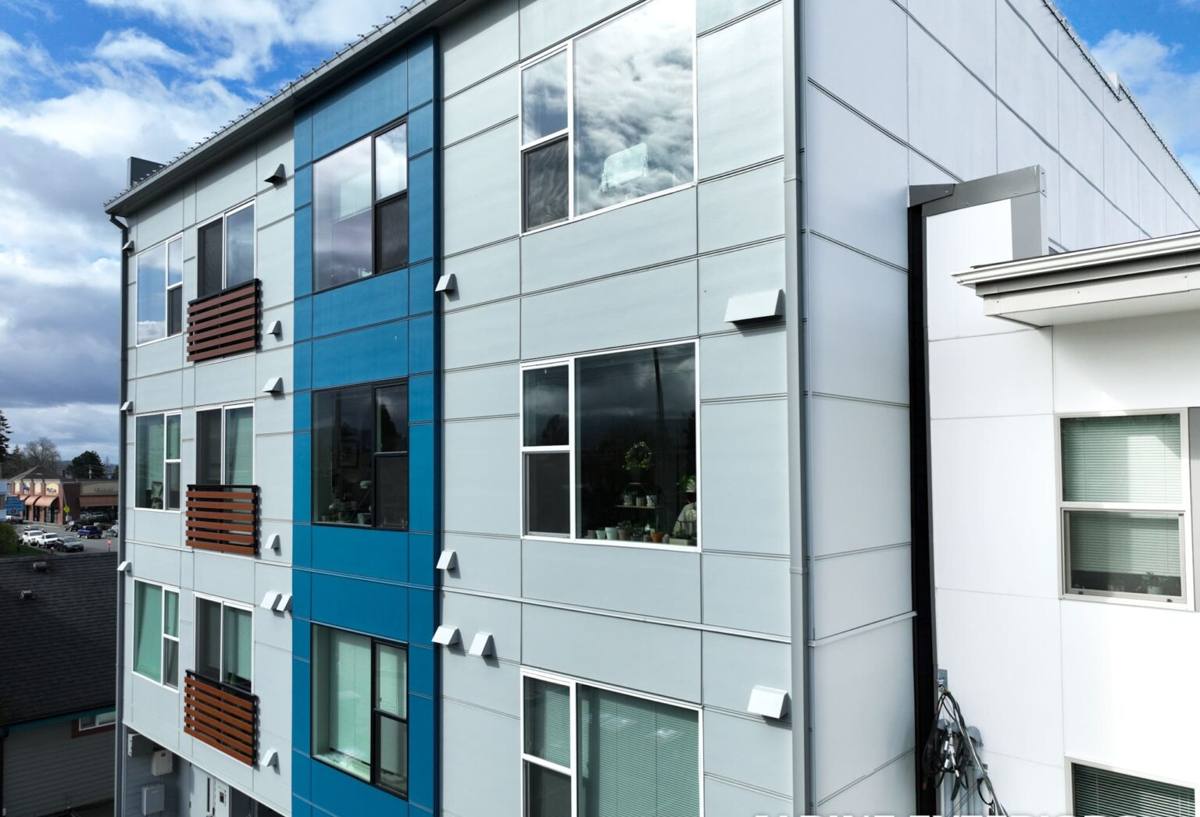
Why This Climate Is Hard on Siding
Three regional factors do most of the damage:
- Salt air: Even a few miles inland from Birch Bay, airborne salt accelerates corrosion on fasteners, flashing, and any metal trim tied into the siding system. Corroded fasteners loosen boards long before the siding itself looks worn.
- Driving rain: Storms here don't just fall straight down — wind-driven rain gets pushed sideways into seams, butt joints, and anywhere caulking has shrunk or separated. Once water gets behind siding, it doesn't dry out quickly in our humidity.
- Long moss season: Shaded north- and west-facing walls stay damp for months at a time. Moss and algae hold moisture against the surface, which is exactly what wood-based and some fiber-cement-adjacent products can't tolerate long-term without breaking down.
None of this means siding is doomed in Whatcom County — it means the material and the installation details have to be matched to the climate, and repairs have to address moisture intrusion, not just cosmetics.
Where Damage Shows Up First
On most Lynden-area homes we inspect, the earliest and worst damage clusters in predictable spots: the bottom few courses of siding near grade, under-eave sections that never fully dry, around window and door trim, and anywhere a deck, porch roof, or fence ties into the wall. These are the areas we check first on every repair call, even if the homeowner's concern is somewhere else entirely.
Signs Your Siding Needs Repair — Not Just Paint
A fresh coat of paint feels like a fix, but it often just hides a moisture problem for another season. Watch for these signs that point to an actual repair need:
- Soft, spongy, or bubbling areas when you press on the siding, especially near the bottom courses
- Visible swelling or delamination at butt joints and corners
- Paint that's peeling or alligatoring in patches rather than evenly across the wall
- Persistent moss or dark streaking that returns within weeks of cleaning
- Gaps or cracked caulking around windows, doors, and trim
- Rust streaks below nail heads or metal flashing
- A musty smell or visible staining on interior walls that share an exterior wall with damaged siding
Any one of these on its own might be minor. Several together — especially soft spots plus interior staining — usually mean water has been getting behind the siding for a while.
What a Correct Siding Repair Job Actually Involves
A repair that's done right isn't just "replace the bad board." It's a small investigation followed by a fix that accounts for what let water in.
1. Diagnose Before Cutting
We remove enough surrounding material to see the sheathing, house wrap, and flashing behind the damaged siding — not just the board itself. If the water barrier or flashing detail failed, replacing the siding alone just sets up the same failure again.
2. Check the Structure Underneath
Soft or damaged siding sometimes means the sheathing underneath has also taken on moisture. We probe for soft wood and address any rot before new siding goes back on — patching over compromised sheathing is one of the most common shortcuts we see from past work, and it never holds.
3. Correct the Water Path, Not Just the Symptom
This might mean re-flashing a window head, adding or correcting kick-out flashing where a roofline meets a wall, re-caulking with a product rated for our climate, or adjusting clearance where siding sits too close to grade, a deck, or a walkway.
4. Match Material and Finish
Repairs should blend into the existing wall in profile, exposure, and color — not stand out as an obvious patch. When exact matches aren't available, we talk through the honest options with the homeowner rather than installing something that looks wrong for the next ten years.
5. Reinstall to Spec
Correct fastener type and placement, proper gapping at joints, and manufacturer-specified clearances all matter more in a wet, salt-air climate than in a dry one. Skipping these details is exactly why the original repair likely failed.
Repair vs. Replace: How We Help You Decide
Not every problem area needs a full re-side, but sometimes a repair is just delaying an inevitable full replacement. Here's the general framework we use when walking a Lynden-area home:
| Situation | Usually Repair | Usually Replace |
|---|---|---|
| Damage isolated to one or two wall sections | Yes | No |
| Widespread soft spots across multiple elevations | No | Yes |
| Siding is under 10 years old and otherwise sound | Yes | No |
| Siding is original, 25+ years old, with recurring failures | No | Yes |
| Underlying sheathing is sound | Yes | Depends |
| Sheathing rot found in multiple areas | No | Yes |
| Existing material is discontinued or hard to match | Depends | Often |
We'll always tell you honestly when a repair is the right call and when it's just postponing a bigger job. There's no upside to us talking a homeowner into a full replacement they don't need — or into a patch that won't last.
Our Process When We Come Out to Lynden
- Inspection: We walk the exterior, probe suspect areas, and check attic or crawlspace access points if interior staining suggests deeper moisture intrusion.
- Honest assessment: We explain what we found, why it likely happened given the exposure and orientation of that wall, and what your real options are.
- Written scope: A clear, itemized plan — what gets removed, what gets inspected underneath, what gets corrected, and what material goes back on.
- The work itself: Careful removal, structural checks, corrected flashing and water management, and a reinstall done to manufacturer spec.
- Final walkthrough: We show you what was done and why, so you understand the repair rather than just trusting that it's fixed.
Why James Hardie Is What Goes Back On
When a repair calls for new siding material — whether it's a few boards or a full elevation — we use James Hardie fiber cement, and only James Hardie. We don't install LP SmartSide, vinyl, Cemplank, Allura, primed spruce, or cedar, and in a climate like this one, the reasoning is straightforward:
- Non-combustible material: Fiber cement doesn't feed a fire the way wood-based products can.
- Moisture-resistant by design: Hardie's HZ product lines are engineered specifically for wet, humid, or coastal-influenced climates like ours, rather than a one-size-fits-all formulation.
- Factory-applied ColorPlus finish: The finish is baked on under controlled conditions, which holds up far better against our driving rain and UV exposure than field-applied paint on a patch.
- Proven long-term performance: Correctly installed Hardie siding has a strong track record in exactly the conditions Lynden and Birch Bay homes face — salt air, sustained damp, and moss pressure.
- Transferable warranty: A real warranty backing the material matters when you're the one paying for repairs down the road.
We're not against every alternative product on principle — some of them have real strengths. But we've made a professional call to standardize on one system we can install correctly, back with a real warranty, and stand behind, rather than juggling several products with different moisture behaviors and maintenance needs.
Checklist: What to Ask Before Hiring a Siding Repair Crew
- Will you check what's behind the damaged siding, or just replace the visible boards?
- What caused this specific failure, in your professional opinion?
- Are you correcting the water management detail, or just patching over it?
- What material are you using, and why that one for this location?
- Is the fastener and clearance spec going to match manufacturer requirements?
- Do you carry liability insurance and workers' comp coverage?
- Will I get a written scope before work starts, not just a verbal estimate?
- Have you worked in this specific area before, and do you know its typical failure patterns?
Why a Crew That Already Works Lynden Matters
Siding repair isn't generic work. A crew that's spent time on homes throughout this part of Whatcom County already knows which walls take the worst of the wind-driven rain, where moss tends to establish first, and how salt air behaves a few miles off the water versus right on it. That local pattern recognition shortens the diagnosis phase and reduces the chance of missing a related problem nearby.
Being based in Birch Bay also means we're not treating a Lynden repair call as an out-of-the-way trip squeezed between other jobs. It's part of the same territory we work regularly, which matters when you need someone to come back and stand behind the work — not just show up once and disappear.
Get an Honest Look at Your Siding
If you're seeing soft spots, moss that won't quit, or paint failing ahead of schedule, it's worth getting an honest opinion before the damage spreads. We offer free, no-pressure estimates for Lynden-area homes — come take a look, tell you what we find, and let you decide from there. Fill out the form below to get started.